What you need:
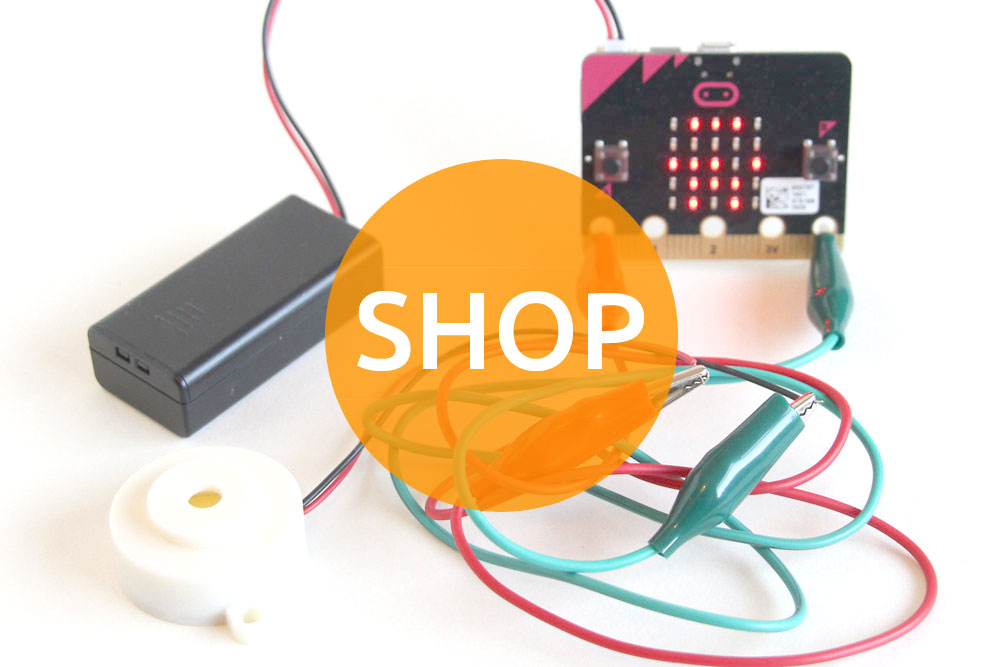
- A micro:bit, battery pack and micro USB cable, plus a suitable computer for programming.
- 1 head band.
- 1 Artronix servo breakout board.
- 2 servo motors and servo horns and screws.
- 3 nuts.
- 3 bolts.
- 3 spacers.
- 4 tiny screws.
- 2 servo mounting brackets.
- 1 servo breakout pcb mounting bracket.
- 1 battery box with 3 AAA batteries.
- loop and hook tape (aka velcro).
- 2 cable ties.
- 2 elastic bands
- 2 hair clips
- 1 sheet of felt
- 1 template
- Small philips screwdriver.
- Small spanner or pliers.
- Scissors.
<picture of all the parts>
Step One: The Basic Code
You’re going to use the Python editor on the micro:bit website to gode this project.
Click here to open the editor.
Copy the basic Python script for this project below:
Motion Reactive Servo Cyborg Ears code:
# Artronix Jam - cat ears
# play animated sequences
# Tested with SG90 servo @ 3.3v
# Copy and paste this into the compiler at http://python.microbit.org/editor.html

from microbit import *
import microbit

class Servo:

#    A simple class for controlling hobby servos.
#    Args:
#        pin (pin0 .. pin3): The pin where servo is connected.
#        freq (int): The frequency of the signal, in hertz.
#        min_us (int): The minimum signal length supported by the servo.
#        max_us (int): The maximum signal length supported by the servo.
#        angle (int): The angle between minimum and maximum positions.
#    Usage:
#        SG90 @ 3.3v servo connected to pin0
#        = Servo(pin0).write_angle(90)
#	be sure to add sleep(20) after setting each servo.

    def __init__(self, pin, freq=50, min_us=600, max_us=2400, angle=180):
        self.min_us = min_us
        self.max_us = max_us
        self.us = 0
        self.freq = freq
        self.angle = angle
        self.analog_period = 0
        self.pin = pin
        analog_period = round((1/self.freq) * 1000)  # hertz to miliseconds
        self.pin.set_analog_period(analog_period)

    def write_us(self, us):
        us = min(self.max_us, max(self.min_us, us))
        duty = round(us * 1024 * self.freq // 1000000)
        self.pin.write_analog(duty)
        self.pin.write_digital(0)  # turn the pin off

    def write_angle(self, degrees=None):
        degrees = degrees % 360
        total_range = self.max_us - self.min_us
        us = self.min_us + total_range * degrees // self.angle
        self.write_us(us)

#

ears = [
    90, 10,      180, 10,        90, 10,      0, 10,      90, 10,
     90, 10,      180, 10,        90, 10,      0, 10,      90, 10,

    90, 10,      90, 10,        90, 10,      90, 10,      90, 10,
     90, 10,      180, 10,        90, 10,      0, 10,      90, 10,

    90, 10,      180, 10,        90, 10,      0, 10,      90, 10,
     90, 10,      90, 10,        90, 10,      90, 10,      90, 10,

    90, 15,      180, 15,        90, 15,      0, 15,      90, 15,
     90, 5,      180, 5,        90, 5,      0, 5,      90, 5,

    90, 20,      0, 20,        90, 20,      180, 20,      90, 20,
     90, 5,      90, 5,        90, 5,      90, 5,      90, 5,

    90,10
    ]

left_ear_index = 0 # position index
left_ear_timer = 0 # sub timer count down to 0
left_ear_step = 0 # step amount
left_ear_position = 0 # current absolute position
left_ear_target = 0 # current absolute position
left_ear_flag = 0 # run ledt ear animation sequence
left_ear_stop = 0 # run ledt ear animation sequence


right_ear_index = 0 # position index
right_ear_timer = 0 # sub timer count down to 0
right_ear_step = 0 # step amount
right_ear_position = 0 # current absolute position
right_ear_target = 0 # current absolute position
right_ear_flag = 0 # run ledt ear animation sequence
right_ear_stop = 0 # run ledt ear animation sequence

animation = 1
animnumber = 6
tilt_latch = 0
#

while True:

    if (left_ear_flag + left_ear_stop) == 0:
        left_ear_flag = 1
        left_ear_target = ears[2+(left_ear_index * 2)]
        left_ear_timer = ears[1+(left_ear_index * 2)]
        left_ear_step = (left_ear_target - ears[(left_ear_index * 2)] ) / left_ear_timer

    left_ear_position = int (left_ear_target - (left_ear_step * left_ear_timer))

    left_ear_timer = left_ear_timer - 1

    if left_ear_timer < 0 :
        left_ear_index = left_ear_index + 1
        left_ear_flag = 0
        if (left_ear_index%5) == 0:
            left_ear_stop = 1

    ##

    if (right_ear_flag + right_ear_stop) == 0:
        right_ear_flag = 1
        right_ear_target = ears[2+(right_ear_index * 2)]
        right_ear_timer = ears[1+(right_ear_index * 2)]
        right_ear_step = (right_ear_target - ears[(right_ear_index * 2)] ) / right_ear_timer

    right_ear_position = int (right_ear_target - (right_ear_step * right_ear_timer))

    right_ear_timer = right_ear_timer - 1

    if right_ear_timer < 0 :
        right_ear_index = right_ear_index + 1
        right_ear_flag = 0
        if (right_ear_index%5) == 0:
            right_ear_stop = 1


    if left_ear_stop == 0 :
        Servo(pin0).write_angle(left_ear_position) # write rescaled
    else:
        pin0.write_analog(0)
        pin0.write_digital(0)

    sleep(20)

    if right_ear_stop == 0 :
        Servo(pin1).write_angle(right_ear_position) # write rescaled
    else:
        pin1.write_analog(0)
        pin1.write_digital(0)

    sleep(20)

    if (left_ear_stop + right_ear_stop) == 2:


# read controlls
# Button Advance check
        if microbit.button_a.was_pressed():
            left_ear_stop = 0
            right_ear_stop = 0
            animation = animation - 1
            if animation <= 0: animation = animnumber - 1 elif microbit.button_b.was_pressed(): left_ear_stop = 0 right_ear_stop = 0 animation = animation + 1 if animation >= animnumber:
                animation = 1


 # Tilt Advance check
        if animation != 0:
            if accelerometer.get_x() > -150:  # tilt recenter reset
                if accelerometer.get_x() < 150:  # tilt recenter reset
                    tilt_latch = 0

            if tilt_latch == 0:

                if accelerometer.get_x() < -350:  # tilt controll sensitivity
                    left_ear_stop = 0
                    right_ear_stop = 0
                    animation = animation - 1
                    if animation <= 0: animation = animnumber - 1 tilt_latch = 1 if accelerometer.get_x() > 350:  # tilt controll sensitivity
                    left_ear_stop = 0
                    right_ear_stop = 0
                    animation = animation + 1
                    if animation >= animnumber:
                        animation = 1
                    tilt_latch = 1


# mode switch
        if animation == 1:
            left_ear_index  = 0
            right_ear_index = 5
            display.show(Image( "00000:"
                                "00000:"
                                "00900:"
                                "00000:"
                                "00000" ))
        elif animation == 2:
            left_ear_index  = 10
            right_ear_index = 15
            display.show(Image( "00000:"
                                "00900:"
                                "09090:"
                                "00900:"
                                "00000" ))
        elif animation == 3:
            left_ear_index  = 20
            right_ear_index = 25
            display.show(Image( "00000:"
                                "09990:"
                                "09990:"
                                "09990:"
                                "00000" ))
        elif animation == 4:
            left_ear_index =  30
            right_ear_index = 35
            display.show(Image( "00900:"
                                "09990:"
                                "99099:"
                                "09990:"
                                "00900" ))
        elif animation == 5:
            left_ear_index =  40
            right_ear_index = 45
            display.show(Image( "09990:"
                                "99999:"
                                "99999:"
                                "99999:"
                                "09990" ))
Download the .py file.
Download the .hex file
Flash the code to your microbit then we can start building.
Step Two: Assemble the servo breakout board.
You can plug up to 3 servo motors into our servo breakout board but in this application we’re just using 2.
<pictures of pcb assembly>
- Feed a bolt through microbit pin0, pin1 and Ground.
- Thread a spacer onto each bolt.
- Mount the microbit onto the servo breakout board and securely it with the 3 nuts.
Step Three: Wiring Up the Project
Okay, lets wire this up. First, make sure your micro:bit is powered down. Connect the 3 x AAA battery box to the terminal block.
<picture of terminal connections>
- Attach the Black Ground wire to the top terminal. It’s marked with a “-” sign.
- Attach the Red wire to the terminal below that. It’s marked with a “+” sign.
With the screwdriver, loosen the terminal connector a little and feed the wire in the hole. Screw the terminal connector back down so it grips the wire securely. Be sure you’re gripping the exposed wire and not the insulation. This can be fiddly so just be patient and you’ll eventually get it right.
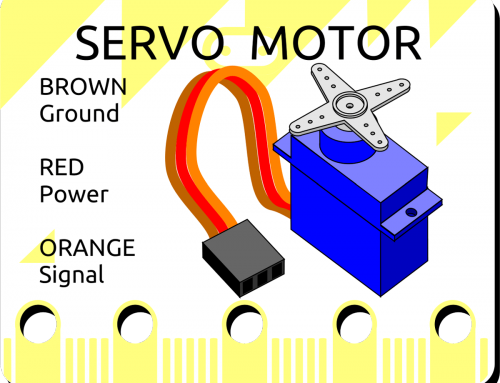
<picture of servo motors>
Once your wires are secure, plug the servo motors into the left and middle of the three connectors. Ignore the connector on the right. The DATA wire which in this case is probably ORANGE must be positioned on the side of the connector closest to the micro:bit.
Step Four: Test our build so far.
Make sure you have batteries in the 2 battery boxes. Turn on the SERVO battery box then plug in the micro:bit battery box. With luck the servo motors will twitch and centre. Hold the microbit upright and tilt it to the side, the Servo Motor animations should run, moving the motors. Tilt one way for the next animation and the other for the previous animation.
Repeat this procedure to get the motors to centre once more. As soon as you hear the motors move and stop, turn the motor power off. This leaves the motors in the right position for further assembly.
If you don’t hear the motors moving:
- Is the micro:bit ok? You should see red led patterns and no error messages.
- Are your Servo Motors plugged into the right connector and the correct way round?.
- Are the 3AAA battery box wires connected to the terminal block correctly and securely?
Step Five: The build.
Unplug the servo motors and set the electronics aside for the moment. Find the clear plastic microbit mounting bracket, peel the protective plastic off both sides and slide it to the top of the hairband. You want the edges of the bracket to go under the band so the middle of the bracket sits above your head.
Tip: If you have trouble peeling the plastic, use a piece of sticky tape to grip it.
<picture of bracket in place>
Attach 5cm of the rough ‘hook’ side of the hook and loop tape to the top of the mounting bracket. Attach 5cm of the soft ‘loop’ side to the back of the servo pcb.
Now attach 2.5cm of hook tape to the back of each battery box and 2.5cm of loop tape to the front.
<picture of all velcro steps>
Sandwich the battery boxes between the serv pcb bracket and the servo pcb. This should now sit securely on the top of your head.
Step Six: The build continues.
Let’s mount the servo motors.
- Locate the 2 servo motor mounting brackets. Remove the protective film.
- Locate the 2 correct servo horns.
- Find the 4 tiny screws. They’re the smallest ones in the kit. Don’t lose ’em.
<picture of servo horn assembly>
Screw the servo horns to the mounting brackets. Push the servo motors into the servo horns and with the smallest screw provided with the servo motor, secure the motor in place as shown.
Note that the mounting bracket has a top and a bottom with the wider slot at the top. Assemble the 2 units so they are mirror images of one another.
<picture of servo and bracket>
Slide the motors onto the hare band.
<picture of servos in place>
Episode VII: The Force Awakens.
Why didn’t I make Yoda ears? Sorry, Step 7. Ears we are making.
Locate the paper template and cut the shapes out with scissors.
<paper template download>
Place the templates on the felt and draw round the edges with a felt tip. I like to use a colour that’s close to that of the felt so if any remains, it doesn’t show up much. Cut the hear pattern from the felt. You can usually get 3 ears from one piece of felt. Good to have a spare.
<picture of templates and felt>
Once you’ve cut out the ears, fold them up as shown and carefully feed them over the servo motor.
<picture of ear folding>
<picture of ear feeding>
once you’re happy with the position of your ears, you can use a cable tie to make sure they don’t slide off the motor.
<picture of cable tie>
Plug the servo motors back into the servo board (remember the ORANGE Data IO wire is the closest to the micro:bit). Turn the power back on and plug the micro:bit back on.
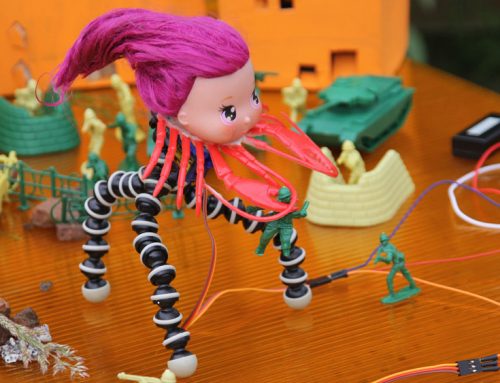
<picture of powered up ears>
When worn, you can change the animation pattern by rocking your head from side to side.
Careful not to shake them off your head 🙂 We included some hair clips and elastic bands in the kit. You can attach them as shown and clip them to your hair for extra security.
<picture hair clip mod>
A cool extension to the project would be to find a way to distribute the weight better or hide the batteries somewhere else…or utilise the third connector to add another servo, make a tail?
Coming Soon: more projects.
- Control your ears from a phone app via bluetooth.
- Create light reactive ears.
- Create sound reactive ears.
- Synchronise multiple ears with radio.
- convert the ears into a power visor
- add a robotic tail
Do please share any exciting projects or pictures you create with your cyber ears.