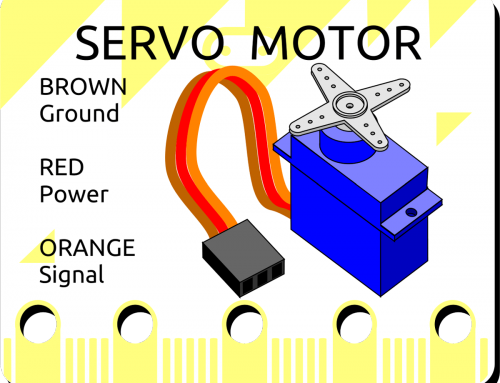
What you need:
- A micro:bit, battery pack and micro USB cable, plus a suitable computer for programming.
- 1 set of steampunk goggles.
- 1 Artronix servo breakout board.
- 2 Artronix wired addressable LED rings.
- 3 nuts.
- 3 bolts.
- 3 spacers.
- 2 lenses.
- 2 lense mounts.
- 1 servo breakout mounting bracket.
- 1 battery box with 3 AAA batteries.
- loop and hook tape (aka velcro).
- Small philips screwdriver.
- Small spanner or pliers.
- Scissors.
<picture of all the parts>
Step One: The Basic Code
You’re going to use the Python editor on the micro:bit website to gode this project.
Click here to open the editor.
Copy the basic Python script for this project below:
Motion Reactive LED Goggles code:
# Artronix addressable LED Goggles code by Jim Watt
# Use button A and Button B to select animation pattern.
# Alternatively tilt head to the left and right (x axis).
# Use Buttons A and B together to suspend animations Button A or B to resume.
# Attach 16 addrressable LED rings (WS2812) to Pin1 and Pin2.
from microbit import *
import neopixel
import microbit
from random import randint
# Setup the LED rings (WS2812) on pin0 and pin1 with a length of 16 pixels each
np1 = neopixel.NeoPixel(pin1, 16)
np0 = neopixel.NeoPixel(pin0, 16)
animnumber = 6 # number of animation modes
animation = 4 # start on rainbow animation
init = 1 # set to 1 to initiate new animation
tilt_latch = 0 # latch for tilt switch
pixel_id = 0
redstep = 1
red = 1
greenstep = 1
green = 1
bluestep = 1
blue = 1
############### animation LEDoff ###############
def LEDoff():
global init
if init == 1:
display.show(Image("00000:00000:00500:00000:00000"))
for pixel_id in range(0, len(np1)):
np1[pixel_id] = (0, 0, 0)
np0[pixel_id] = (0, 0, 0)
# Display the current pixel data on the Neopixel strip
np1.show()
np0.show()
sleep(500)
if microbit.button_a.was_pressed():
sleep(50)
if microbit.button_b.was_pressed():
sleep(50)
init = 0
################## end LEDoff ##################
########### animation LEDlessrandom ###########
def LEDlessrandom():
global init
global pixel_id
if init == 1:
display.show(Image("99999:99999:99999:99999:99999"))
init = 0
#Iterate over each LED in the strip
red = randint(0, 1)
green = randint(0, 1)
blue = randint(0, 1)
# Assign the current LED a random red, green and blue value between 0 and 60
np1[pixel_id] = (red*60, green*60, blue*60)
np0[pixel_id] = (red*60, green*60, blue*60)
# Display the current pixel data on the Neopixel strip
np1.show()
np0.show()
sleep(20)
red = randint(0, 4)
green = randint(0, 4)
blue = randint(0, 1)
microbit.display.set_pixel(red, green, blue*9)
pixel_id = pixel_id + 1
if pixel_id &amp;amp;amp;amp;gt;= len(np1):
pixel_id = 0
############## end LEDlessrandom ##############
###### LEDpulse (r-speed,g-speed,b-speed) ######
def LEDpulse(r,g,b):
global init
global red
global redstep
global green
global greenstep
global blue
global bluestep
if init == 1:
display.show(Image("90009:07070:00500:07070:90009"))
redstep = 1
red = 0
greenstep = 1
green = 0
bluestep = 1
blue = 0
init = 0
#Iterate over each LED in the strip
for pixel_id in range(0, len(np1)):
# Assign the current LED a random red, green and blue value between 0 and 60
np1[pixel_id] = (red, green, blue)
np0[pixel_id] = (red, green, blue)
# Display the current pixel data on the Neopixel strip
np1.show()
np0.show()
red = red + r * redstep
if red &amp;amp;amp;amp;gt;= 60:
red = 60
redstep = -1
if red &amp;amp;amp;amp;lt;= 0: red = 0 redstep = 1 green = green + g * greenstep if green &amp;amp;amp;amp;gt;= 60:
green = 60
greenstep = -1
if green &amp;amp;amp;amp;lt;= 0: green = 0 greenstep = 1 blue = blue + b * bluestep if blue &amp;amp;amp;amp;gt;= 60:
blue = 60
bluestep = -1
if blue &amp;amp;amp;amp;lt;= 0: blue = 0 bluestep = 1 ################# end LEDpulse ################# #### animation LEDspectrum(rainbow-length) #### def LEDspectrum(rainbow): global init global pixel_id global redstep global red global redgreen global redblue if init == 1: redstep = 0 display.show(Image("00900:00700:97579:00700:00900")) init = 0 #Iterate over each LED in the strip if redstep &amp;amp;amp;amp;gt;= 60:
red = redstep - 60
if redstep &amp;amp;amp;amp;gt;= 120:
red = 180 - redstep
green = redstep
if redstep &amp;amp;amp;amp;gt;= 60:
green = 120 - redstep
if redstep &amp;amp;amp;amp;gt;= 120:
green = 0
blue = 60 - redstep
if redstep &amp;amp;amp;amp;gt;= 60:
blue = 0
if redstep &amp;amp;amp;amp;gt;= 120:
blue = redstep - 120
redstep = redstep + rainbow
if redstep &amp;amp;amp;amp;gt; 179:
redstep = 0
# Assign the current LED a random red, green and blue value between 0 and 60
np1[pixel_id] = (red, green, blue)
np0[pixel_id] = (red, green, blue)
# Display the current pixel data on the Neopixel strip
np1.show()
np0.show()
pixel_id = pixel_id + 1
if pixel_id &amp;amp;amp;amp;gt;= len(np1):
pixel_id = 0
################# end LEDpulse #################
################ LEDtilt z axis ################
def LEDtilt():
global init
global pixel_id
if init == 1:
display.show(Image("00000:00900:09090:00900:00000"))
init = 0
#Iterate over each LED in the strip
red = int ((accelerometer.get_z())/9)+30
if red &amp;amp;amp;amp;lt; 0: red = 0 if red &amp;amp;amp;amp;gt;60:
red = 60
green = 60 - red # int ((accelerometer.get_y()+1024)/15)%60
blue = 0 # int ((accelerometer.get_z()+1024)/15)%60
# Assign the current LED a random red, green and blue value between 0 and 60
np1[pixel_id] = (red, green, blue)
np0[pixel_id] = (red, green, blue)
# Display the current pixel data on the Neopixel strip
np1.show()
np0.show()
pixel_id = pixel_id + 1
if pixel_id &amp;amp;amp;amp;gt;= len(np1):
pixel_id = 0
################# end LEDtilt #################
################## main loop ##################
while True:
if animation == 0:
LEDoff()
elif animation == 1:
LEDlessrandom()
elif animation == 2:
LEDpulse(1,0,0) # RGB pulse rates
elif animation == 3:
LEDpulse(5,0,6) # RGB pulse rates
elif animation == 4:
LEDspectrum(12) # rainbow length 12
elif animation == 5:
LEDtilt()
# Button Advance check
if microbit.button_a.is_pressed() and microbit.button_b.is_pressed():
animation = 0
init = 1
elif microbit.button_a.was_pressed():
animation = animation - 1
if animation &amp;amp;amp;amp;lt;= 0: animation = animnumber - 1 init = 1 elif microbit.button_b.was_pressed(): animation = animation + 1 if animation &amp;amp;amp;amp;gt;= animnumber:
animation = 1
init = 1
# Tilt Advance check
if animation != 0:
if accelerometer.get_x() &amp;amp;amp;amp;gt; -150: # tilt recenter reset
if accelerometer.get_x() &amp;amp;amp;amp;lt; 150: # tilt recenter reset
tilt_latch = 0
if tilt_latch == 0:
if accelerometer.get_x() &amp;amp;amp;amp;lt; -350: # tilt control sensitivity
animation = animation - 1
if animation &amp;amp;amp;amp;lt;= 0: animation = animnumber - 1 init = 1 tilt_latch = 1 if accelerometer.get_x() &amp;amp;amp;amp;gt; 350: # tilt control sensitivity
animation = animation + 1
if animation &amp;amp;amp;amp;gt;= animnumber:
animation = 1
init = 1
tilt_latch = 1
Download the .py file.
Download the .hex file
Flash the code to your microbit then we can start building.
Step Two: Assemble the servo breakout board.
You can plug up to 3 servo motors into our servo breakout board but in this application we’re going to plug 2 addressable LED rings in instead. But first, let’s attach the micro:bit to the board.
<pictures of pcb assembly>
- Feed a bolt through microbit pin0, pin1 and Ground.
- Thread a spacer onto each bolt.
- Mount the microbit onto the servo breakout board and securely it with the 3 nuts.
Step Three: Wiring Up the Project
Okay, lets wire this up. First, make sure your micro:bit is powered down.Connect the 3 x AAA battery box to the terminal block.
<picture of terminal connections>
- Attach the Black Ground wire to the top terminal. It’s marked with a “-” sign.
- Attach the Red wire to the terminal below that. It’s marked with a “+” sign.
With the screwdriver, loosen the terminal connector a little and feed the wire in the hole. Screw the terminal connector back down so it grips the wire securely. Be sure you’re gripping the exposed wire and not the insulation. This can be fiddly so just be patient and you’ll eventually get it right.
<picture of LED Rings>
Once your wires are secure, plug the LED Rings into the left and middle of the three connectors. Ignore the connector on the right. The DATA wire which in this case is probably GREEN must be positioned on the side of the connector closest to the micro:bit.
Step Four: Test our build so far.
Make sure you have batteries in the 2 battery boxes. Turn on the LED battery box then plug in the micro:bit battery box. With luck the led rings should burst into life! Hold the microbit upright and tilt it to the side, the LED animations should change. Tilt one way for the next animation and the other for the previous animation.
<picture of working led rings>
If the LED rings aren’t lit:
- Is the micro:bit ok? You should see red led patterns and no error messages.
- Are your LED rings plugged into the right connector and the correct way round?.
- Are the 3AAA battery box wires connected to the terminal block correctly and securely?
Step Five: The build.
Unplug the LED rings and set the electronics aside for the moment.
Get the goggles and find one end of the elastic strap. It has a metal terminator on it. Undo this by gently prizing it apart. Set it aside for later. Unthread the strap from the goggles and the adjustable buckle.
<picture of goggle strap undoing>
Find the clear plastic microbit mounting bracket, peel the protective plastic off both sides and thread it onto the strap.
Tip: If you have trouble peeling the plastic, use a piece of sticky tape to grip it.
Reassemble the strap and adjust it to a comfortable length for your head.
<picture of bracket in place>
Attach 5cm of the rough ‘hook’ side of the hook and loop tape to the back of the mounting bracket. Attach 5cm of the soft ‘loop’ side to the back of the servo pcb.
Now attach 2.5cm of hook tape to the back of each battery box and 2.5cm of loop tape to the front.
<picture of all velcro steps>
Sandwich the battery boxes between the serv pcb bracket and the servo pcb. This should now sit securely behind your head.
Step Five: the build continues.
Finally let’s mount the LED rings. Unscrew the front lens cups from the goggle eye pieces. Find the 2 lenses and the 2 lense mounts. Remember to remove the protective film.
<picture of exploded LED Rings>
- Place the lense in the cup.
- Sandwich the LED Ring in next.
- Place the lense mount in last. Note the mount has indents on the outer edge for the wires to go through
Carefully screw the assemblies back into the goggles so the ring is held securely.
<picture of lense inside>
There’s a vent on the side of the goggles just behind where the strap attaches. feed the led connector through this vent. You may have to chop out part of the vent to make room. Plug the LED Rings back into the servo board (remember the GREEN Data IO wire is the closest to the micro:bit). Turn the power back on and plug the micro:bit back on.
<picture of powered up goggles>
When worn, you can change the animation pattern by rocking your head from side to side.
Coming Soon: more projects.
- Control your goggles from a phone app via bluetooth.
- Create light reactive goggles.
- Create sound reactive goggles.
- Synchronise multiple goggles with radio.
Do please share any exciting projects or pictures you create with your goggles.
Shine on you crazy diamonds.